AKS Kubernetes Upgrade Runbook
Like any Kubernetes upgrade, you cannot skip minor versions — 1.31 → 1.35 must go 1.31 → 1.32 → 1.33 → 1.34 → 1.35. Repeat Steps 1–7 below once per minor version.
Step 1: Find the cluster
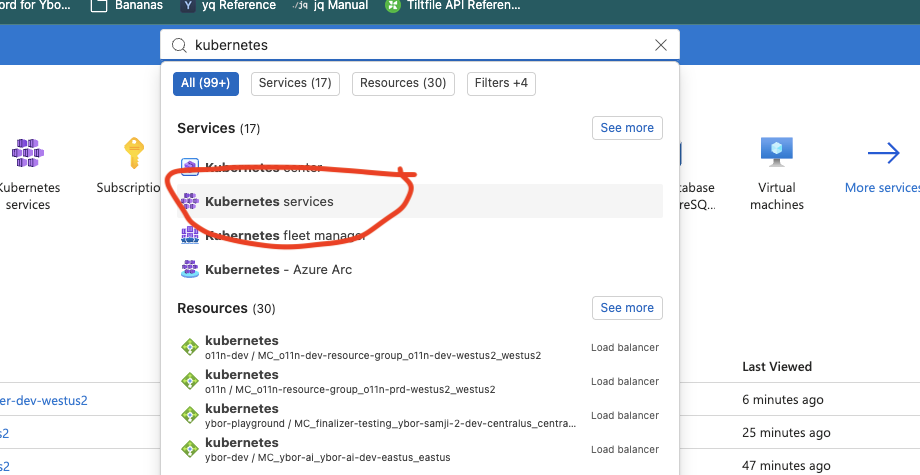
In the Azure Portal, search for kubernetes and open Kubernetes services.
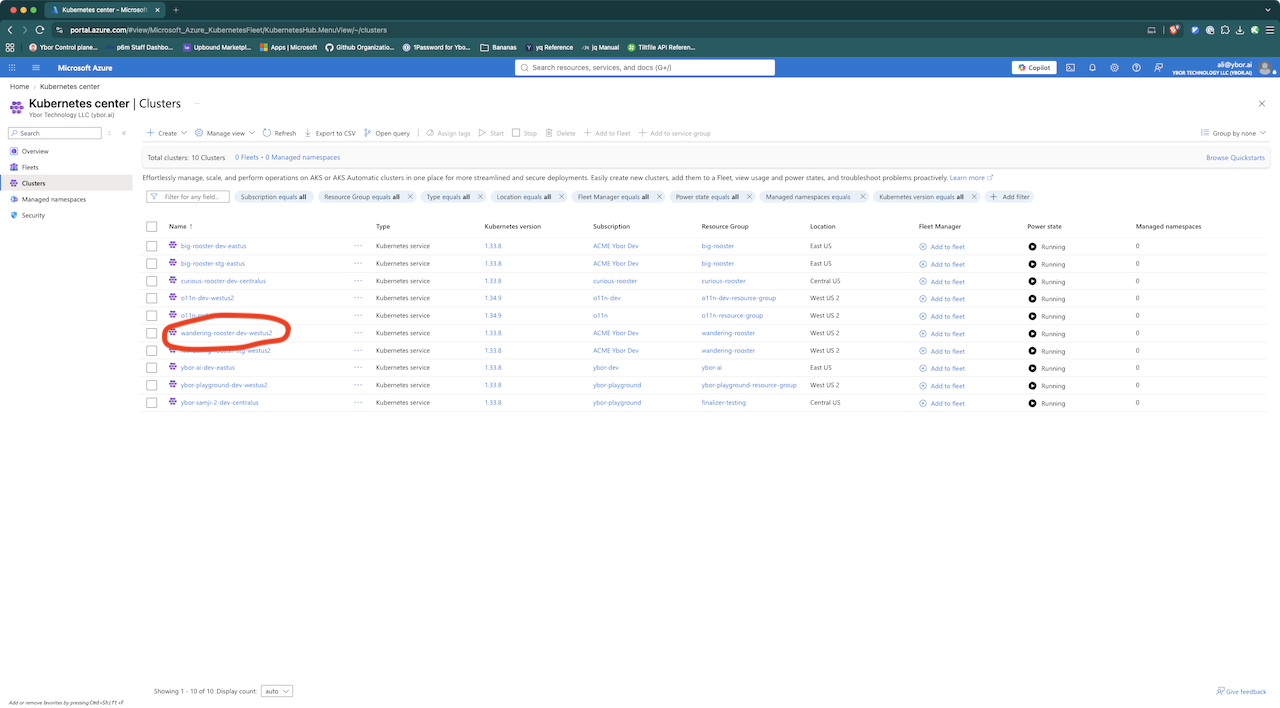
Select the target cluster from the cluster list.
Step 2: Open the upgrade blade
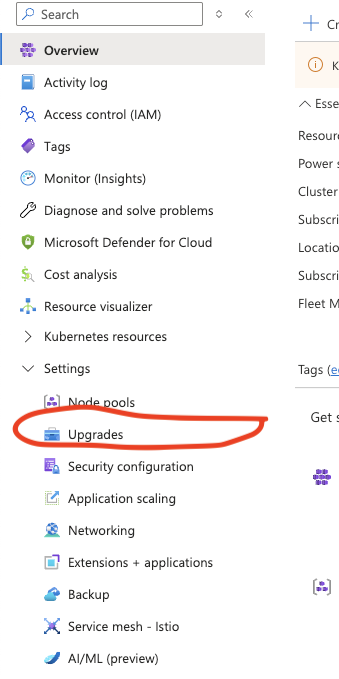
In the cluster's left-hand menu, under Settings, click Upgrades.
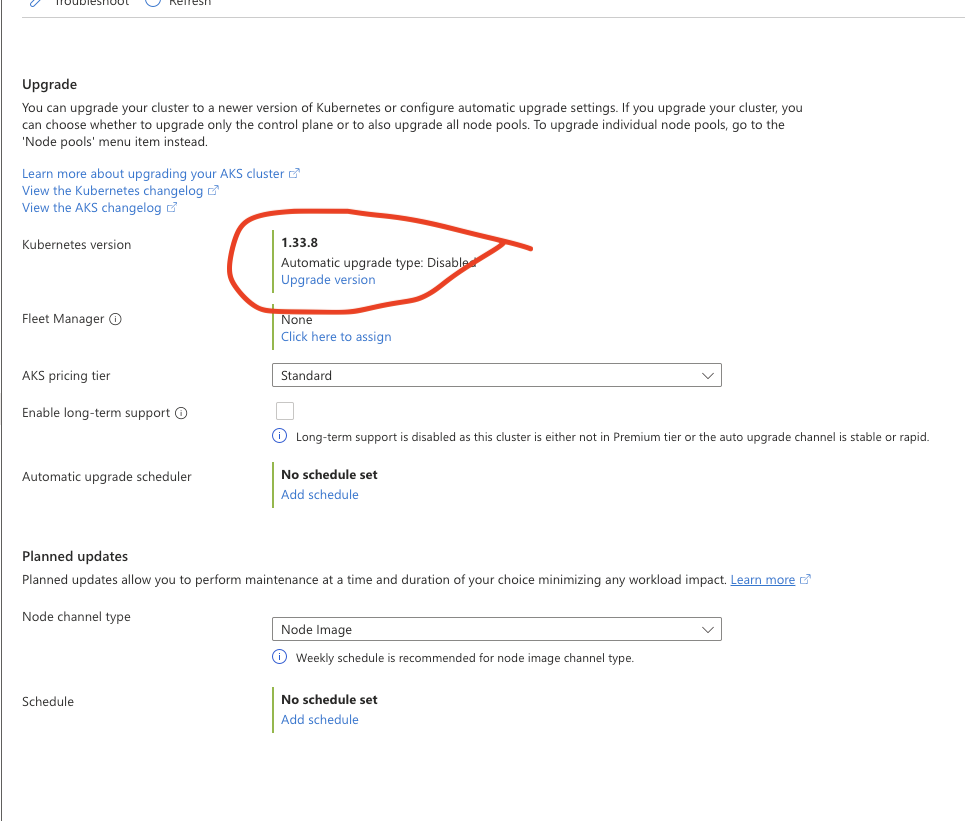
Click Upgrade version.
Step 3: Select the target version and scope, then Check
Select the target version. Under Upgrade scope, select Upgrade control plane + all node pools. Click Check.
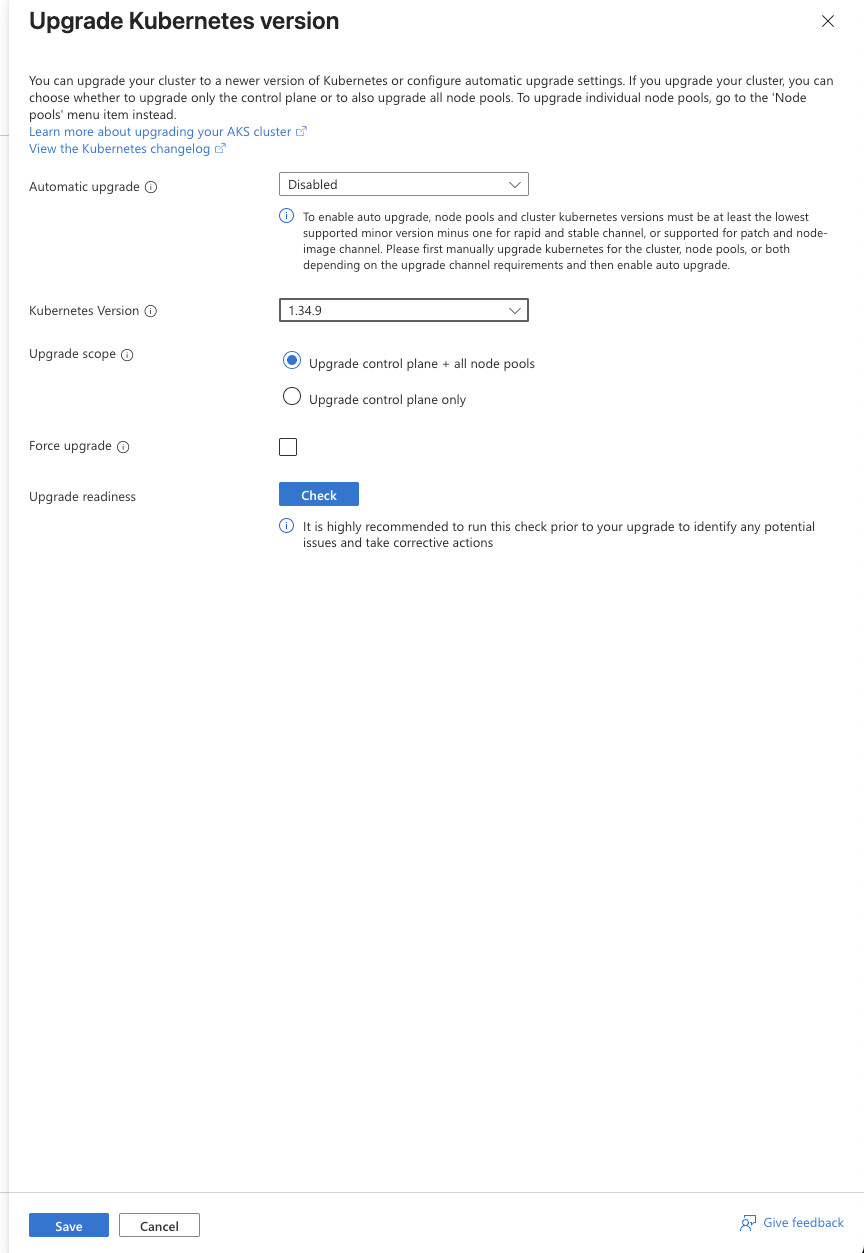
Step 4: Read the check result, then save
Check shows an inline message in the dialog:
- Success:
Cluster is ready for upgrade for this version. - Failure: an inline error describing the specific issue (quota, CRD mismatch, etc).
The Portal does not block Save if Check fails or hasn't been run — Microsoft doesn't wire the two together. Read the check result yourself and resolve any reported issue before clicking Save.
Once Check succeeds, click Save to start the upgrade.
Step 5: Wait for the upgrade to finish
The upgrade runs asynchronously in Azure. Wait for it to complete before proceeding.
Step 6: Backport the version to VersionConfig
platform-versions is not customer-accessible — this step is not yet self-service. Contact Ybor support to request the version bump.
Open a PR against platform-versions to update spec.kubernetes.version on the cluster's VersionConfig (or the ancestor it resolves to via spec.extendRef) to match the version just applied in the Portal.
On EKS, the VersionConfig bump happens first and nodes roll over afterward. On AKS, do the opposite — upgrade via the Azure Portal first, then backport the version to VersionConfig.
Azure's ClusterAPI provider tries to bump the control plane and node pools to the new version at the same time. Node pools can never be on a later version than the control plane, so the node pool upgrade fails until the control plane finishes — and Azure's ClusterAPI provider does not retry a failed node pool upgrade (it logs this will not be retried). This race condition does not exist in the Azure Portal, so the Portal is used to drive the upgrade, and the change is backported to VersionConfig afterward.
Skipping this step won't downgrade the cluster, but it leaves VersionConfig out of sync with the cluster's actual version. That mismatch breaks ClusterAPI's reconcile loop, so the platform can't manage the cluster until the two match again.
If VersionConfig is more than one version behind, set it straight to the version the cluster runs now. Don't step it through the versions in between: Azure accepts a node pool rollback to a version the pool ran in the last 90 days, so an in-between version the pool ran recently could be accepted as a rollback.
Step 7: Karpenter-managed nodes roll over on their own — usually
Karpenter-managed nodes have a 7-day TTL and roll over to the new version automatically within a week. No manual intervention is needed if you're only doing a single minor version bump and can wait out the week.
Caveat: upgrading across multiple minor versions
Because each version step requires the previous step's nodes to be fully on the new version before you can move on (see the "one minor version at a time" rule above), waiting a full week per step to upgrade e.g. 1.31 → 1.35 (4 steps) is impractical.
To skip the wait, manually cordon and drain every Karpenter-managed node that hasn't rolled over yet, forcing them to be replaced with new-version nodes immediately.
Cordon every old-version node first, then start draining. If you drain node A while node B (same old version) is still uncordoned, a pod evicted from A can get rescheduled onto B — right back on the old version.
# 1. Cordon every old-version node first
kubectl cordon <node-name-1>
kubectl cordon <node-name-2>
# ... repeat for all old-version nodes

# 2. Only then start draining
kubectl drain <node-name-1> --ignore-daemonsets --delete-emptydir-data
kubectl drain <node-name-2> --ignore-daemonsets --delete-emptydir-data
There's no need to kubectl delete node afterward — Kubernetes deletes the underlying node automatically once it's drained.
If drain hangs on a PDB
A drain can stall reporting PodDisruptionBudget violations. Since all old-version nodes are already cordoned (per above), it's safe to force the pod off by restarting its owning workload:
kubectl rollout restart deployment/<name> -n <namespace>
# or
kubectl rollout restart statefulset/<name> -n <namespace>
This schedules a new pod and only deletes the old one once the new one is ready. Because every old-version node is cordoned, the new pod can't land back on one — avoiding another drain hang.
If the app itself is failing to run (no pods are ready), rollout restart will hang forever — the new pod will never become ready, so the old pod is never deleted. In that case, delete all of that app's pods directly instead.
Repeat for every old-version Karpenter node before proceeding to the next Portal upgrade.
Verification
- Confirm the control plane and all node pools report the target version in the Azure Portal.
- Confirm the merged
VersionConfigPR matches the version now running on the cluster. - Confirm no old-version Karpenter nodes remain.
- If upgrading across multiple minor versions, repeat Steps 1–7 for the next version before moving on.