Basic Deployment
This series is using mendhak/http-https-echo as the containerized application to demo PlatformApplication functionality. Check out mendhak's GitHub repository for more options if you are curious.
What You'll Learn
In this lesson, you'll learn:
- Required fields for a Platform Application
- How to deploy a container
- How to verify the deployment
- Platform's production-ready defaults
- Understanding autoscaling, security, and resilience features
Manifest
This example demonstrates the absolute minimum configuration required to deploy a container using a PlatformApplication.
apiVersion: meta.p6m.dev/v1alpha1
kind: PlatformApplication
metadata:
  name: demo-http-echo
  namespace: demo-http-echo
  labels:
    p6m.dev/app: demo-http-echo
spec:
  deployment:
    image: mendhak/http-https-echo:31
    ports:
      - port: 8080
        protocol: http
    readinessProbe:
      port: 8080
      path: /
Important Fields
The minimal PlatformApplication for a web service requires three fields:
- spec.deployment.image: The container image to deploy
- If you do not define 'image', the
PlatformApplicationfails validation and does not get applied to the Kubernetes cluster.
- If you do not define 'image', the
- spec.deployment.ports: Ports the container listens on
- If you do not define 'ports', the
PlatformApplicationwill deploy a Pod with no exposed ports. - You may want this for an application that takes input from a Queue (or similar), instead of network requests.
- If you do not define 'ports', the
- spec.deployment.readinessProbe: Health check configuration
- If you do not define 'readinessProbe', the Platform Application Operator will assign the probe to port 8081.
- mendhak/http-https-echo does not have anything running on port 8081 though, so without this assignment the Pod will never be marked as Ready.
- For more information on Probes check out the official documentation.
What Gets Created
By applying this PlatformApplication, the Platform Application Operator automatically creates:
For a detailed breakdown of all resources, see the Basic Deployment - Details page.
Deploy Steps
- ArgoCD
- kubectl
ArgoCD automatically updates to your PlatformApplication after the Platform Dispatch Action to update your .platform repository is run.
For more information on setting up ArgoCD for Platform Applications, see the ArgoCD Deployment Tutorial.
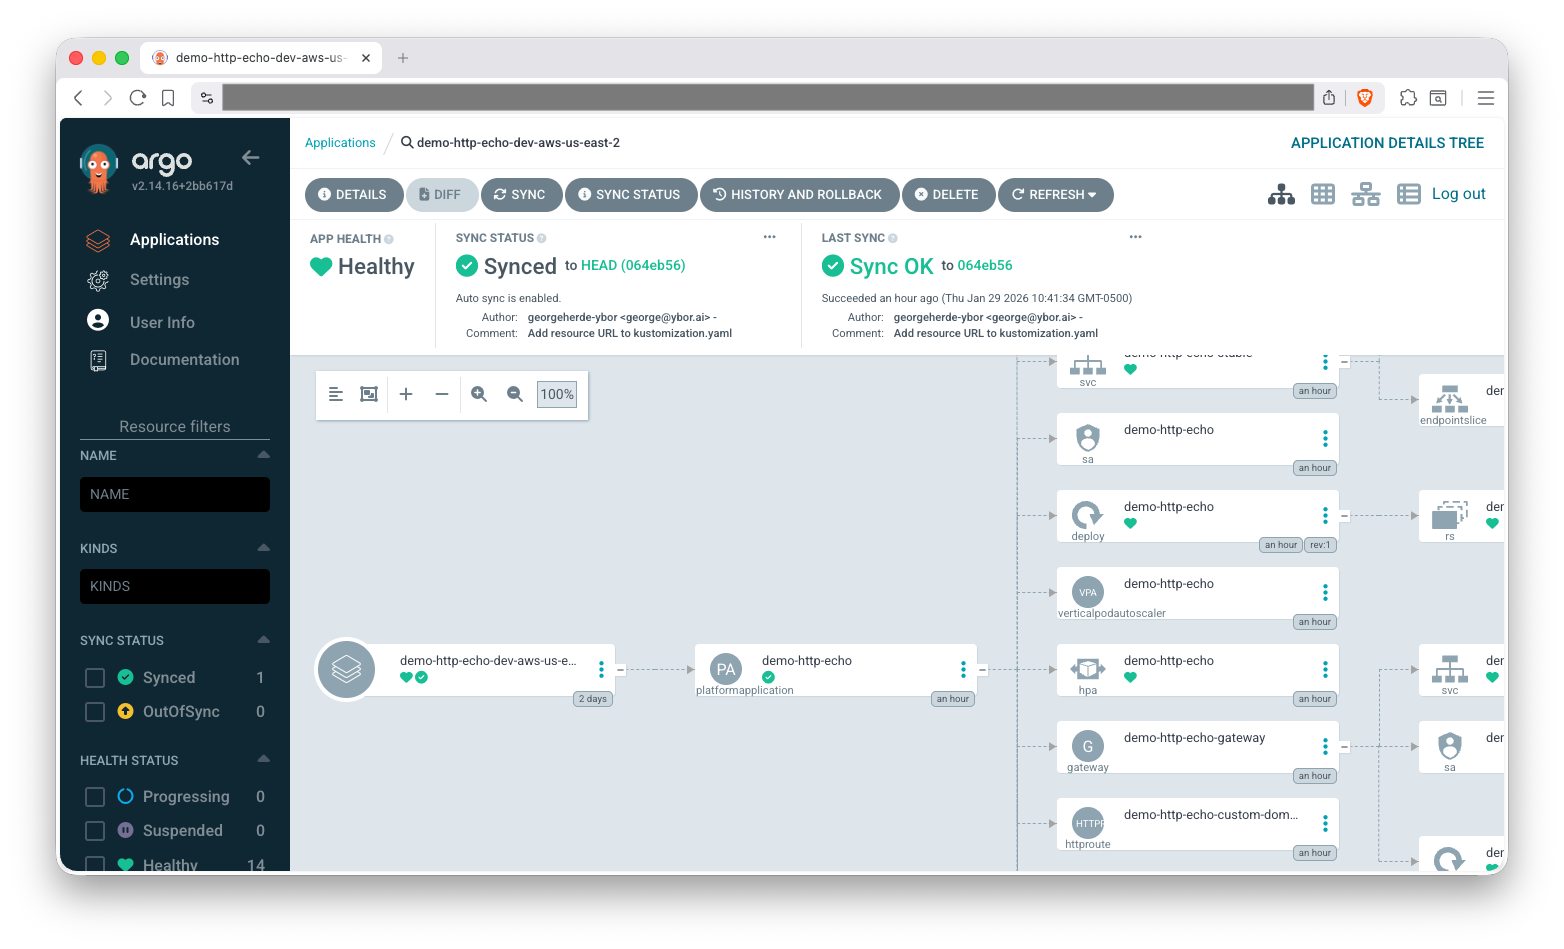
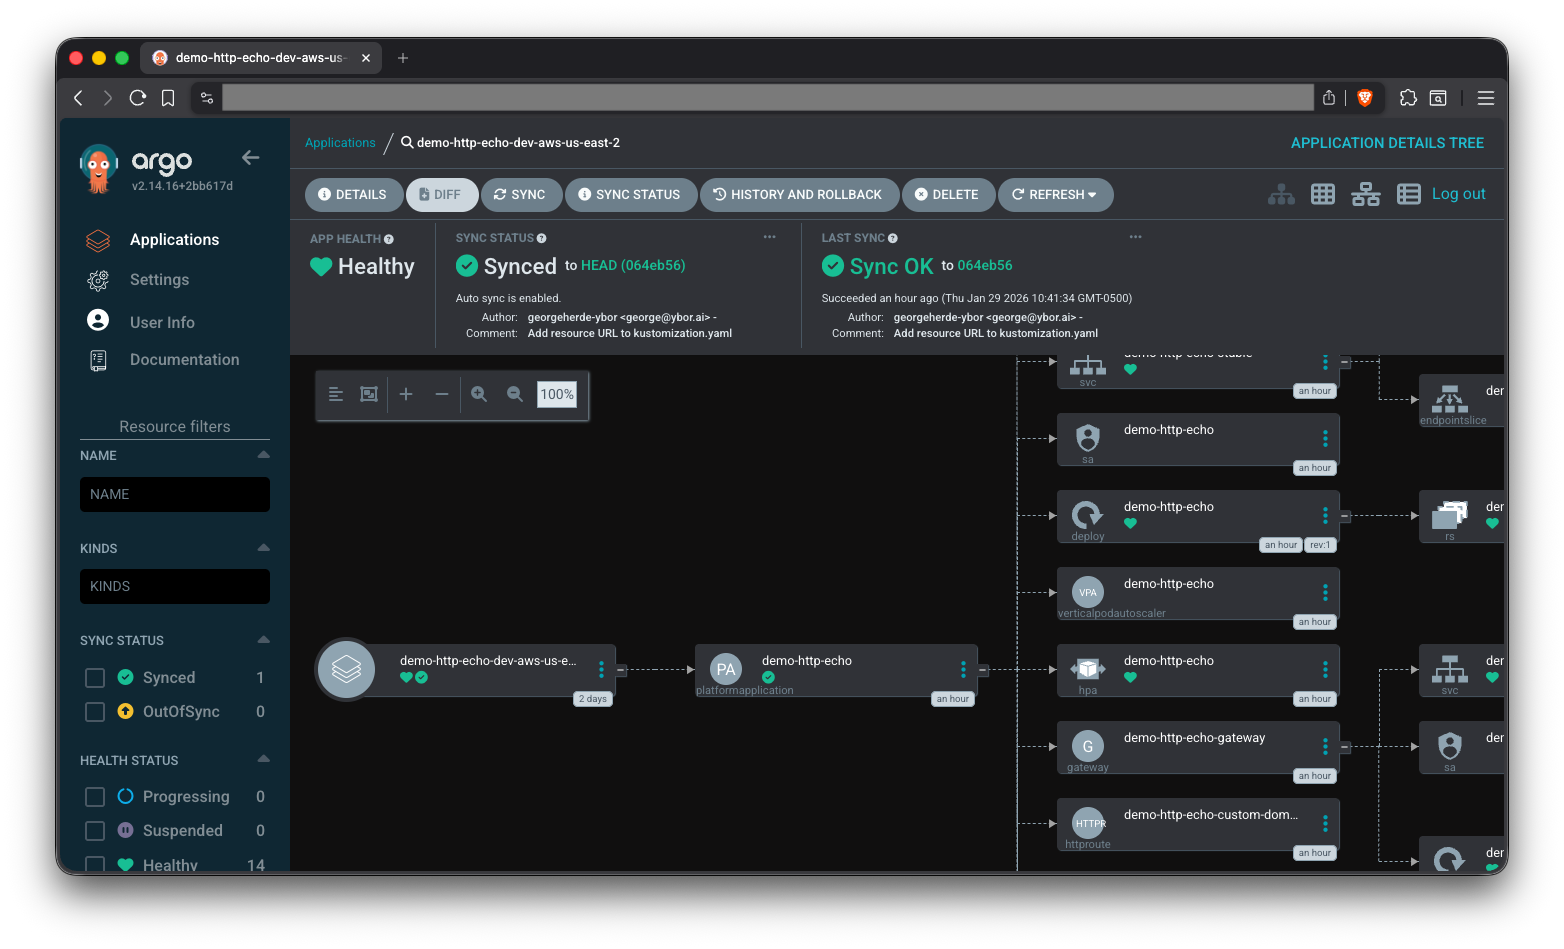
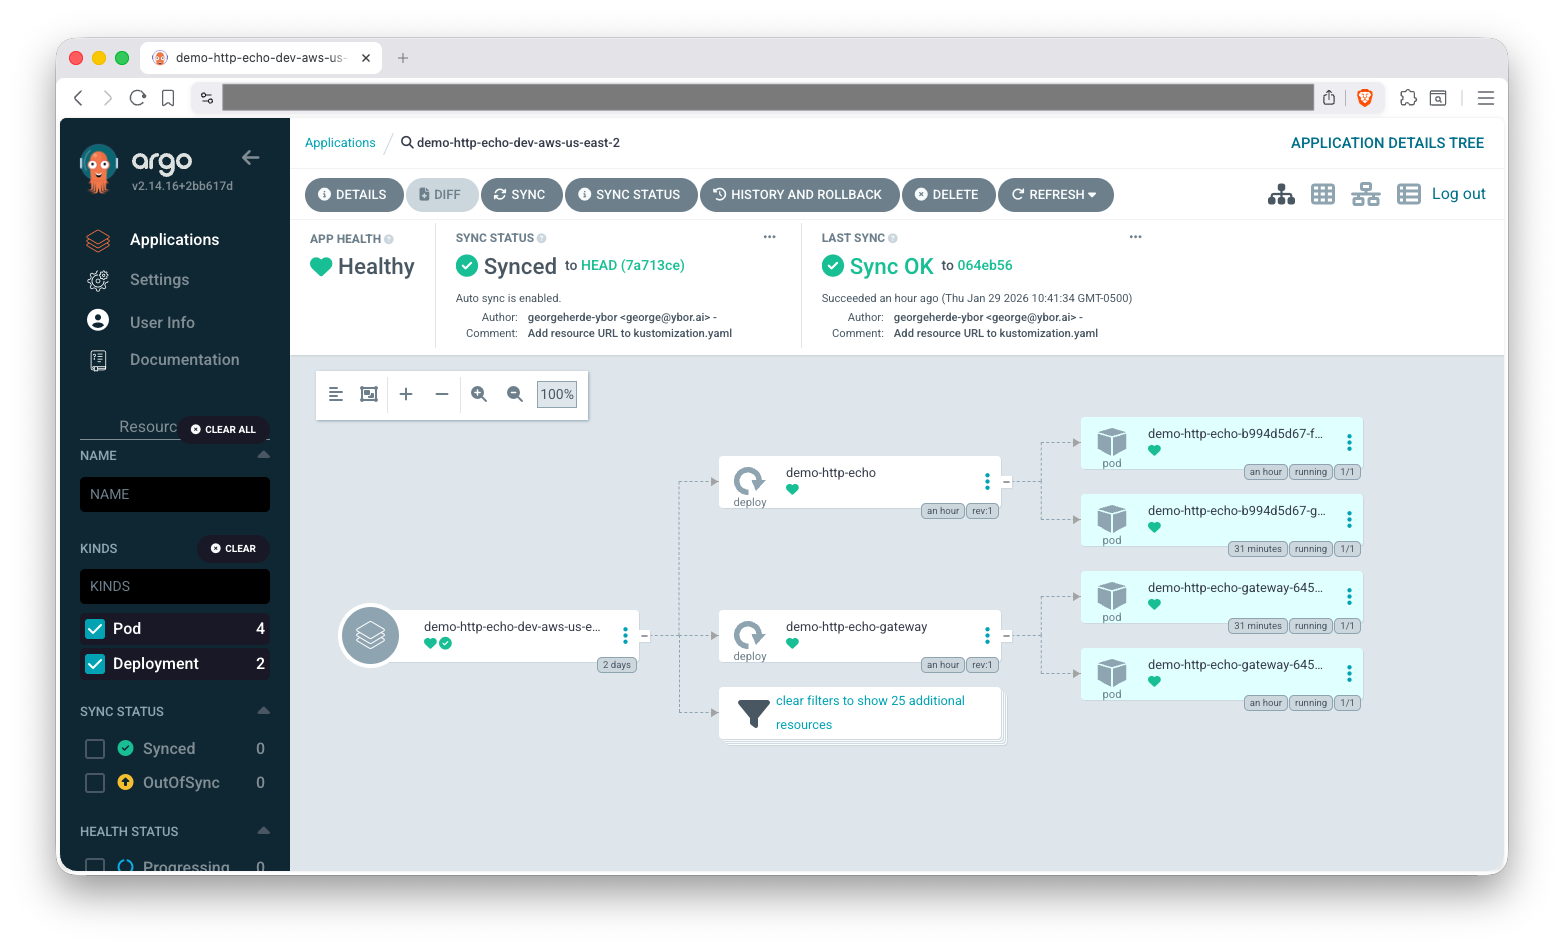
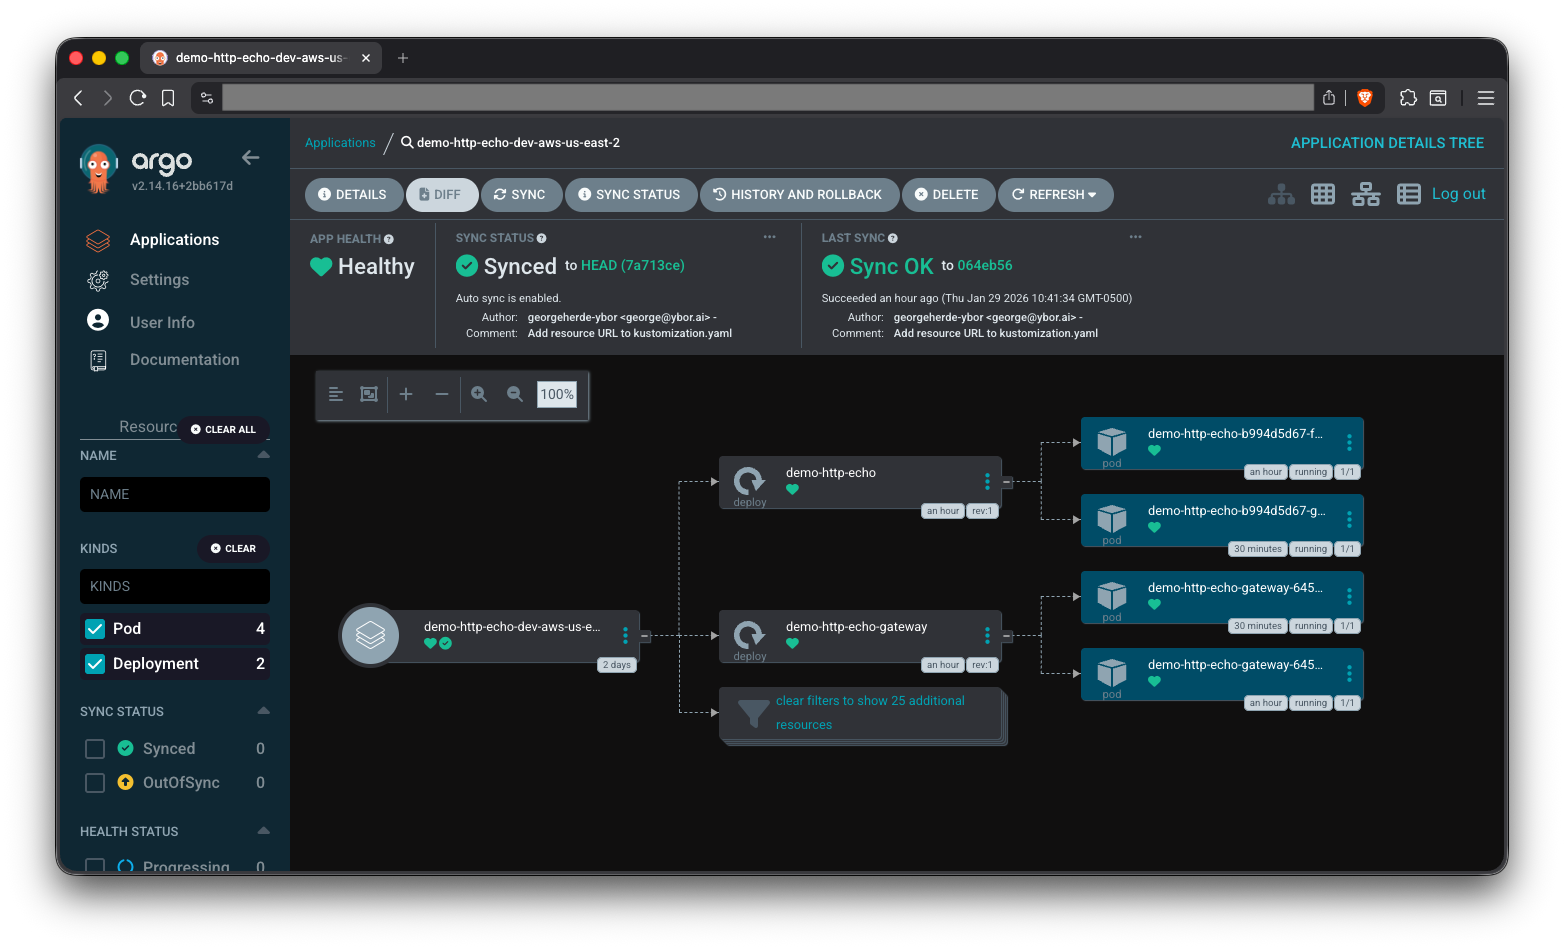
The easiest way to find resources in the ArgoCD, once your application is synced, is to use the various filters on the left side of the ArgoCD UI. Let's use the Kinds filter to locate our Pods and Deployments.
Check out our ArgoCD Cheat Sheet for how to view application logs and other tips on interacting with ArgoCD.
# Create the namespace
kubectl create namespace demo-http-echo

# Apply the Platform Application
kubectl apply -f application.yaml

# Verify pods are running
kubectl get pods -n demo-http-echo -l p6m.dev/app=demo-http-echo

# Access the application via port-forward
kubectl port-forward -n demo-http-echo svc/demo-http-echo 8080:8080
In another terminal:
curl http://localhost:8080

curl -X POST -H "Content-Type: application/json" -d '{"a":"b"}' http://localhost:8080/asdf
You should see a JSON response echoing your request details.
Common Observations
Why are there 2 pods when I didn't specify replicas?
The platform's default HPA configuration requires minimum 2 replicas for high availability. You can customize this in the autoscaling section of your manifest.
It is also important in Kubernetes to run at least 2 pods, so that your application stays available even if the underlying compute Node hosting one Pod needs to be replaced.
What's the Gateway resource for?
Even without ingress enabled, the platform pre-creates a Gateway resource to prepare for easy ingress enablement later. This doesn't expose your application externally until you explicitly enable ingress.
Why so many resources for a "basic" deployment?
The platform prioritizes production readiness over simplicity. These defaults prevent common production issues like single points of failure, resource exhaustion, and security vulnerabilities.
Want to dive deeper? See Basic Deployment - Details for comprehensive resource information, verification procedures, and spec documentation.
Next Steps
- Ingress Configuration - Add external access to your application
- Configuration Management - Add environment variables
- Secret Injection - Inject secrets from cloud secret stores
Troubleshooting
For common issues and solutions, see the Troubleshooting Guide.
Specific sections that may be helpful:
Cleanup
- ArgoCD
- kubectl
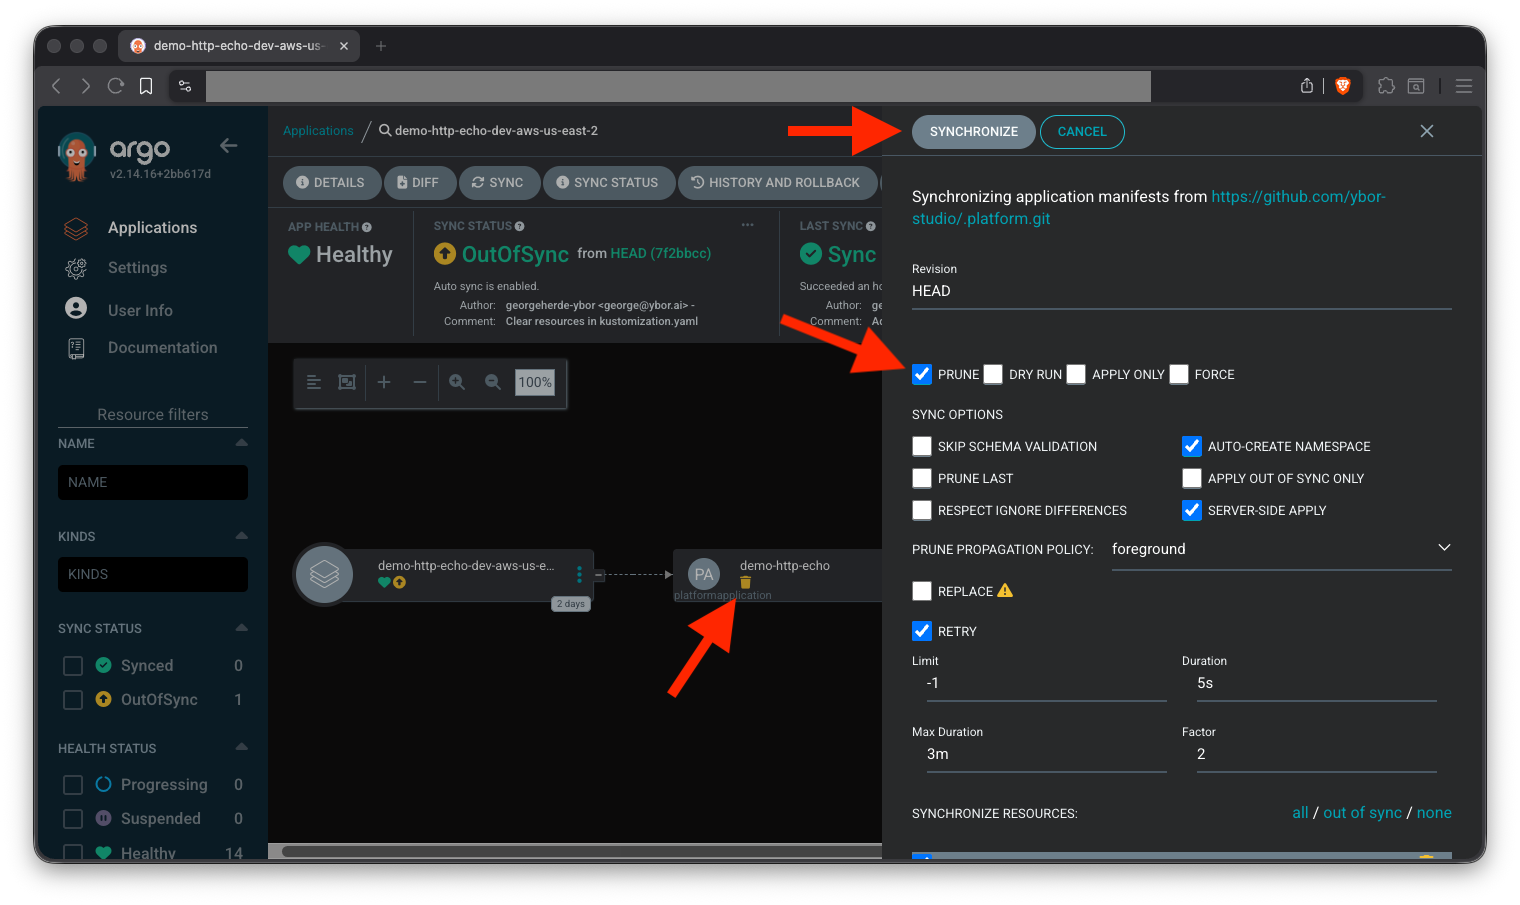
Update your Git repository to remove the PlatformApplication manifest and sync, with prune enabled, the changes in ArgoCD to delete the application.
Prune is not enabled by default, so you will need to execute a manual sync with prune to delete the resources.

To fully clean up the namespace, you will need to delete the related folder in the .platform repository and manually delete the namespace:
kubectl delete namespace demo-http-echo
kubectl delete platformapplication demo-http-echo -n demo-http-echo
kubectl delete namespace demo-http-echo
Related Documentation
Kubernetes Core Concepts
- Kubernetes Deployments - Understanding Deployments
- Kubernetes Services - Understanding Services
- Horizontal Pod Autoscaling - Understanding autoscaling
- Liveness, Readiness and Startup Probes - Understanding health checks
- Owners and Dependents - Understanding ownership references
Tools & CLI
- ArgoCD Documentation - GitOps continuous delivery tool
- kubectl Reference - Kubernetes command-line tool
- Jq Documentation - JSON processor command-line tool